A few months ago, a long-awaited package was delivered from Hong Kong, containing several new additions to the ever-expanding collection of Transformers. Perhaps one of the package's best prizes was Takara Tomy's Dual Model Kit Bumblebee, or DMK-02. As much as it begged me to be built immediately, other priorities held sway for a number of weeks.
When I did get to it, the model took a few weeks, a little bit at a time. I regret not keeping a record of the exact time I took. What I did do, however, was take a photographic record of the steps towards completion.
A short bit of background: I dabbled with model building as a boy, Airfix planes and the like. A few years ago, when my burgeoning Transformers collection was regenerating an interest beyond what I could simply purchase, I tried my hand at reprinting a few. This developed into minor kit bashing, and I have several projects on the go at present. I have modest talents at best. The upshot of this is that if I can make a go of this model, and achieve a degree of success, anyone can. I offer what follows as a visual and instruction guide that may be useful to others who are wanting to attempt this model, some details on the construction, techniques I used, trouble-shooting and tips.
Three important points to note:
- The entire kit can be constructed without glue (although I did use some in a few spots - more on that later)
- You can do the whole thing without adding any paint apps (although I did - again, more on that later)
- The instructions are entirely in a language with which I am not familiar (I have been told it is Japanese, although I'm not absolutely certain). This last point need not scare off potential model builders; the pictorial portion of the instructions is really quite clear and easy to follow, even for virtual neophytes like me.

This shows the entire kit, laid out. There are 10 regular frames of pieces (6 grey/brown, 4 yellow, marked A-J), as well as 1 frame containing the soft rubber tires (marked K), 1 frame of clear plastic (marked L), and 1 frame of silver/grey slightly softer, malleable plastic (for joints and the like, marked PC). Some of the pieces are pre-coloured with tints or paint apps.

(The picture I've taken here not the frame in its untouched state - I'd already dry-brushed it at this stage - see below for details)

One issue I did have with the basic frame is one of the elbow joints was not quite as "together" as it could have been. This particular joint is not able to be taken apart, and it resisted attempts to squeeze it together. Thankfully, the model's movement was not at all impaired, it didn't affect the construction or attachment of other pieces and it is not particularly noticeable.
Personally, I didn't like the look of the grey, slightly brownish base colour of the basic model and the non-yellow pieces. The model and the pieces are extremely well detailed, and I wanted to bring out that detail, so I decided on dry-brushing. I used an initial base coat of Citadel Chaos Black (acrylic, matte), with a top coat with a virtually dry brush of Citadel Boltgun Metal. The biggest problem I have with dry-brushing is that some of my early attempts looked like dry-brushing, so I used a slightly darker grey/silver as the top coat (instead of, say, Citadel Chainmail) and kept it as even and smooth as possible.

I've tried Tamiya acrylics metallic-type colours for dry brushing but didn't really like the results. I've found they have a certain quality that makes them not transfer cleanly from a dry brush.

This is the exoskeleton, with the constructed head and the initial pieces of armour and robot pieces applied (steps 1-2 on the instruction sheet).
On this picture, I've outlined most of the many points of articulation.

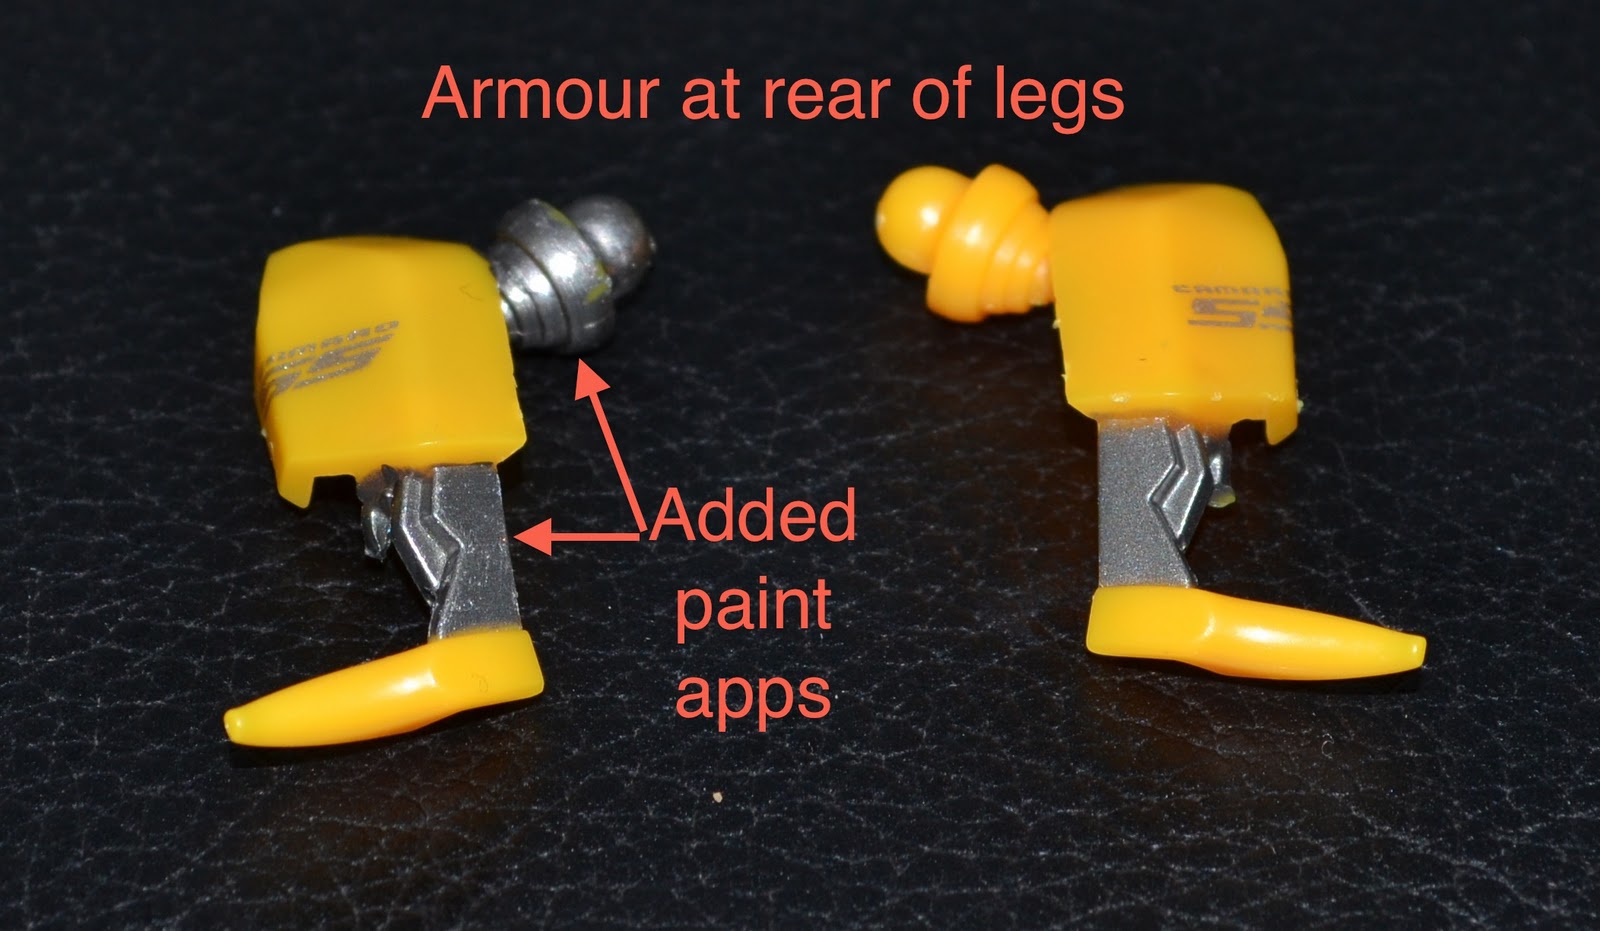
The rear of the figure. As you can see, the dry-brushing has brought out a good deal of the detail. You'll also notice on this picture and the next few, some paint apps that I've judiciously added.

The paints I used were again Citadel acrylics, Sunburnished Gold, Blood Red, and Regal Blue.
See that gold-painted piece at the top of the upper leg? I applied a bit too much pressure on one and it snapped off...

This picture shows the breakage. A touch of glue was enough to secure it back again without effecting the figure all that much, as you'll see a bit further down.
You'll also notice some paint apps that appear on the model out of the box, but I reprinted them to add depth of colour and definition that was a little lacking. I used Citadel Red Gore and Gloss Varnish.
Another hint on the painting - because some of the pieces are extremely small, I did all the base coats and dry brushing while the pieces were still attached to the frame stems. When I cut them away with a scalpel, they just needed a small touch up. While we're talking about the frames stems, don't twist the pieces off unless you want ugly ragged bits of plastic hanging off the model.

Here's a close up of the head:
Most pieces fit together quite snuggly, however the piece at the front of the neck (E10) tended to fall off a few times during the building process. Since completion of the model, it hasn't given much strife, but I think I may glue it in if it falls out again.

And here are some more shots of the legs, following completion of steps 3-5 in the instructions. I used Tamiya Chrome Silver for the wheel rims and discs, for a nice contrast.
A word of warning though; it is difficult with this particular paint to get the silver-type effect without a thicker layer of paint. Several thin coats don't seem to work very well. Make sure you give the paint plenty of time to dry and harden before using the piece.


Then there are the hands. Essentially, you have 3 options. The model comes with open hands (both sides), closed fists (both sides), or a gun/weapon (right side only). Unlike DMK-01 Optimus Prime, there is no finger articulation. The hands can be switched easily. The gun replaces not just the right hand, but entire forearm, and it tipped with a clear piece, which is tinted blue instead of a more movie-accurate orange. It's a minor quibble.


Lastly, there is Bumblebee's yellow outer armour that would form the shell of his alt mode. A few pieces needed extra paint apps - I took pictures half way through the process to show the difference the extra paint made.


Piece number E18 was also painted with the Tamiya Chrome Silver.

The model does have a faint pre-printed 'number plate' on the abdomen of the model. As I had painted over it, I used a sticker from Reprolabels.com, from the '09 Camaro Bumblebee set, which was a nice fit, as well as being more movie accurate.
I also highlighted the car brand emblem.

The rear of the model, showing the bit that I fixed, which is also covered by the leg armour I added paint apps to.
 For those interested in scale, here's a comparison with an 2009 deluxe class Bumblebee.
In conclusion, I absolutely love this model. It is brilliantly detailed and posable. A welcome addition to my collection, and in my opinion, well worth the money it cost.
All I have to do now is find the time for DMK-01, which is currently calling out to me from its box... I can't wait to get stuck into it.


No comments:
Post a Comment